![]()
Revised
31/12/2011
.
|
Following stripping down of the Sierra, I was left with a pile of parts - first job to sort out what had to be kept and what could be binned. It turned out that most of the cars fittings that I meticulously removed weren't required - I'm sure there will be something I will regret getting rid of at a later date.
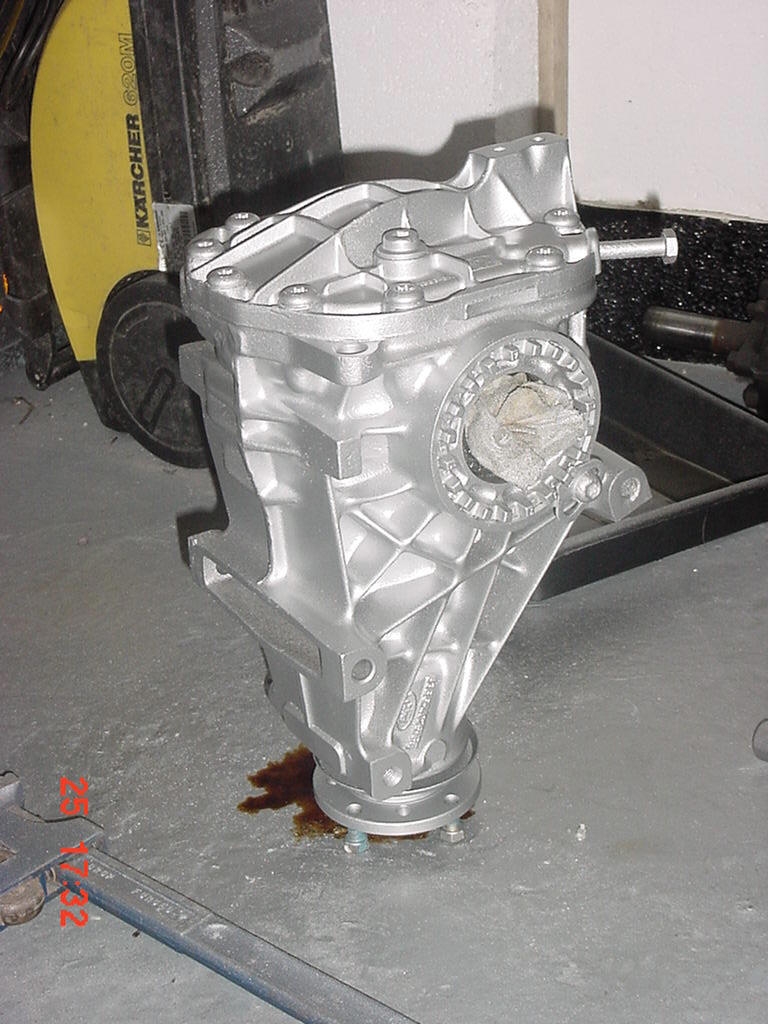
I started off with drive shafts, rear hubs and differential. The hubs were removed from the drive shaft without much difficulty once I had found large enough tools to do the job. I already had a 3/4" drive socket-set with 41mm socket. Using a long steel bar held across the wheel studs I was able to get enough leverage from the oversized wrench to move the nuts (remembering that one has a left handed and one a right handed thread). It would have been far easier to have followed the Haynes manual which reminds you to loosen the nuts prior to removing the drive shafts from the car ! All openings in the differential were tightly sealed and drive shafts and diff case sand blasted - what a difference. The sand blasting kit attaches to my Karcher jet wash. Only trouble is it's surprising how much sand you use. Note that you are not supposed to use sand for dry grit blasting because of the risks of breathing in the silica but its ok for wet blasting. I used bags of kiln dry block paving sand rather than Karcher's own which is identical but about 5 times the price. The only other problem is that if you do this on your drive like I did, it soon starts to resemble a beach, and the sand gets everywhere. With all traces of oil, dirt, and sand removed, and pieces allowed to dry they were treated to several coats of silver hammerite paint and allowed to cure for a few days. 16mm was cut from the rear diff fixing lug prior to applying final coat (otherwise it would clash with the de dion suspension bar )
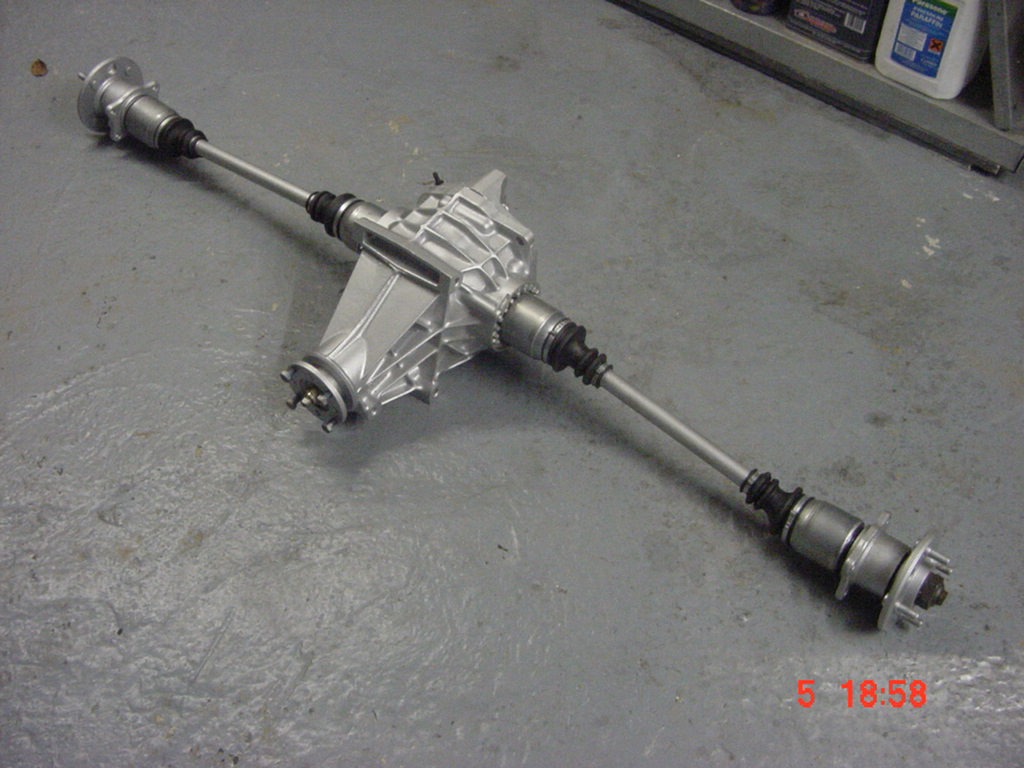
4 drive shaft repair kits and new hub nuts were bought from Benfield Ford at Kirkstall Road, Leeds. At the same time, new differential oil seals and pinion drive flange nut were purchased. I have to say that without a doubt, in my experience, Benfield are the worst garage I have come across for servicing my Galaxy, however their parts department more than make up for it. The tripode joint covers were replaced by following the instructions in the Haynes manual. The important bit is to follow the note that states 'mark the joint spider in relation to the driveshaft centre section'. It wasn't until I was on the second joint that I realised that the joint spiders on each shaft have to aligned in relation to one another.
Next came the front callipers and hubs which received the same sand blasting and painting treatment. I noticed that one of the front hubs doesn't turn as freely as the other - have decided not to do anything about it at the moment but will replace the bearings during the next couple of months once the paint has cured.
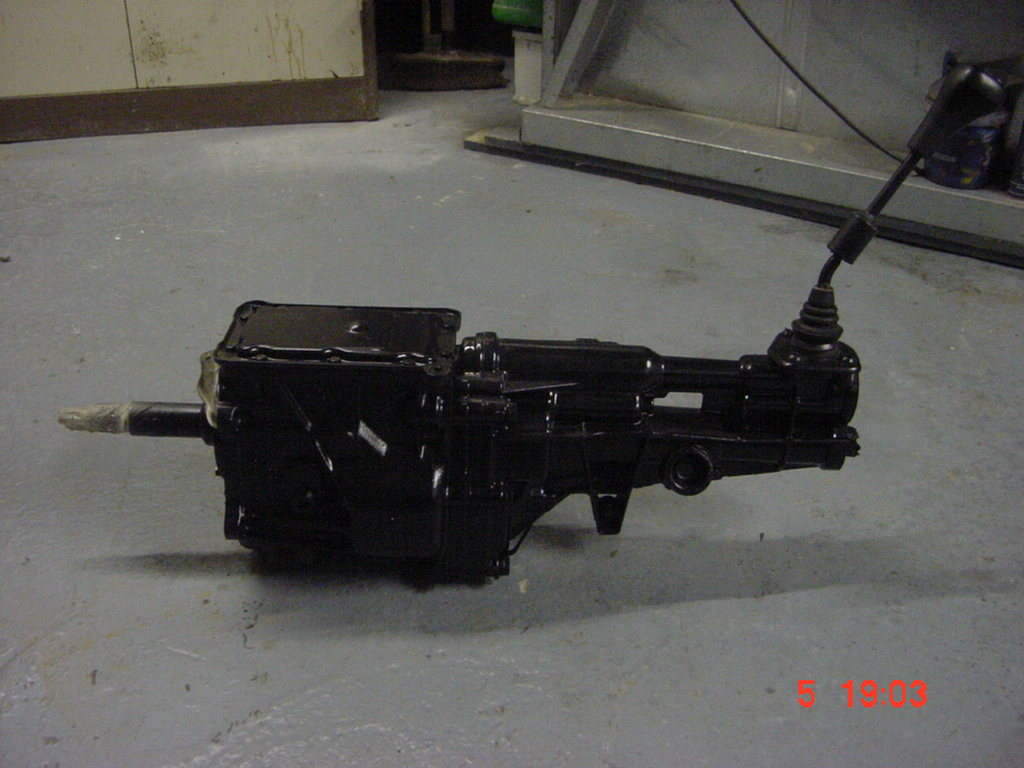
The callipers and brake carriers were given several coats of red brake enamel and new piston seals installed. Having then gone and bought reconditioned rear brake callipers, I realise that painting the front ones red was a bad move, as it didn't cover as well as I thought and began to soften when I used brake fluid to help reinstall pistons (in accordance with Haynes manual instructions) - I will probably exchange them for reconditioned units later. Gearbox, bellhousing and starter motor next. I decided to paint these with black engine enamel which seems to cover better than the silver hammerite. I have decided that for the time being the gearbox will be used without any further reconditioning, apart from the coat of paint and a new quick-shift gear stick - I have read on a couple of build sites that the type 9 gear shift mechanism needs extending further back by a couple of inches so gear stick doesn't clash with the dashboard, when using a Zetec engine - I can't remember Stuart mentioning that - I must check with him.
|

![]()
|
Registration speedo sensor, bonnet catches, final trim, MOT & SVA Nosecone, Rear tub, front mudguards, alarm Finishing fitting the dashboard Carpets, seats and Dashboard Making a start on the interior Lights working Bonnet, Nosecone, Headlights 1st drive Rear mudguards and lights Engine loom wiring, Alternator bracket, Distributor, Engine Started, Speedo sensor, Transmission tunnel fitting, Exhausts, Side panels Steering column, Front axle, Pedal box, Wheel studs, Fuel tank, Wiring loom, Rear tub, Remote oil filter, Front bulkhead / battery shelf, Column switches Footwell panels, Rear axle, Brake pipes, Rear bulkhead, Fuel pump, Engine installed Collect kit from Dax, Painting chassis, Remote oil filter takeoff plate, Floor panels, A frame bushes Gearstick remote, Baffled sump Preparing LT77 gearbox, exhaust options, Costs for kit 3.62:1 LSD Front hub bearings, Engine age Preparing donor differential, drive shafts, hubs
|
|
|